Scaleform StudioでUIを作って表示する
プロジェクト作成
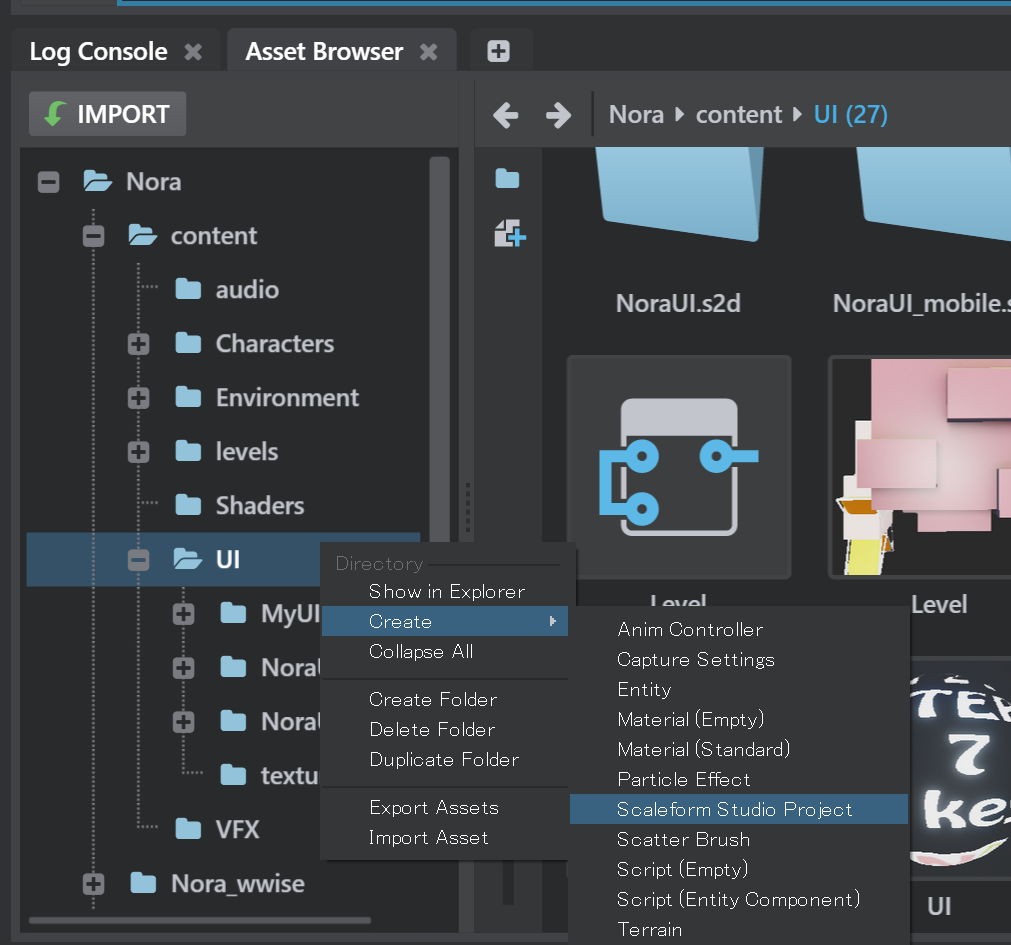
適当なディレクトリにAssetBrowserからScaleform Studio Projectを作成

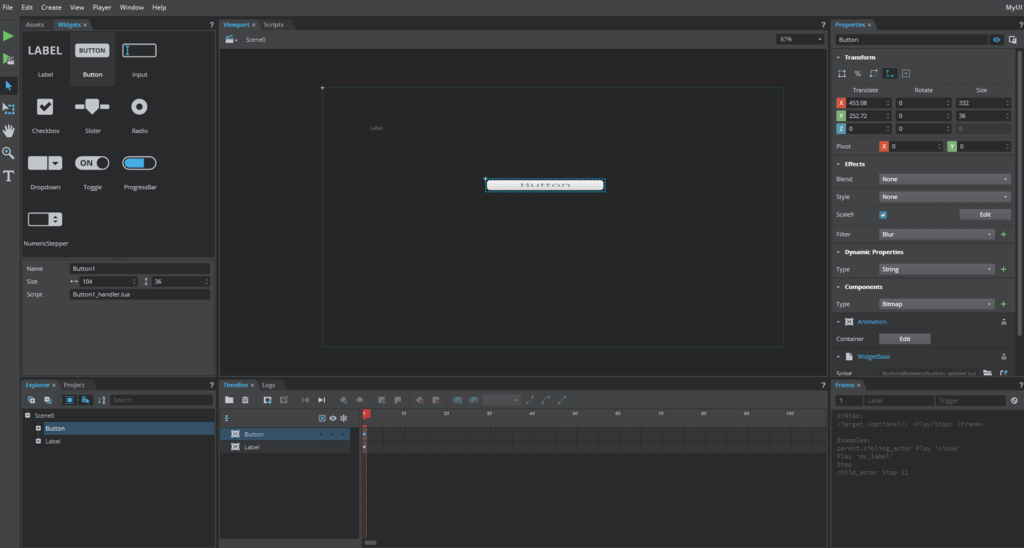
ボタンを一個配置する

boot.packageに登録する
content/UI/TestUI.s2dの場合以下のように登録する
s2d = [
    "content/UI/TestUI"
]
マウスカーソルを表示する設定を仕込む
script/lua/project.lua の Project.on_level_load_pre_flow関数に以下のコードを追記。
stingray.Window.set_mouse_focus(true)
stingray.Window.set_clip_cursor(true)
stingray.Window.set_show_cursor(true)
TestUI.s2d/ButtonWidgets/Button_handler.luaを編集する 22行目からのコードを以下のように修正
clicked = function()
    print(actorName .. " button clicked")

    -- The code below gives an example of how to dispatch a custom event from this event handler function.

    local evt = { eventId = scaleform.EventTypes.Custom,
                  name = "TestButtonClicked",
                  data = "osaretayo" }
    scaleform.Stage.dispatch_event(evt)


end
LevelFlowに表示コードを仕込んでみる
以下の画像は
content/UI/TestUI.s2d
content/UI/TestUI.s2d/TestUI.s2dproj
の場合の例。
実行してボタンを押すと、"osaretayo"とログに表示されるはず。

画像の通り、イベントが発行されたかどうか自分で確認するロジックにする必要があるようだ。
今回の参考記事
マウスカーソル表示の方法
forums.autodesk.com
公式ドキュメント
http://help.autodesk.com/view/Stingray/ENU/?guid=__stingray_help_creating_uis_using_flow_html
Wwiseを使ってBGMを再生する
気分転換にサウンドの演習を。
参考にしたチュートリアル動画ではSEの設定だったが、 なんとなくBGMの設定をした。
下準備
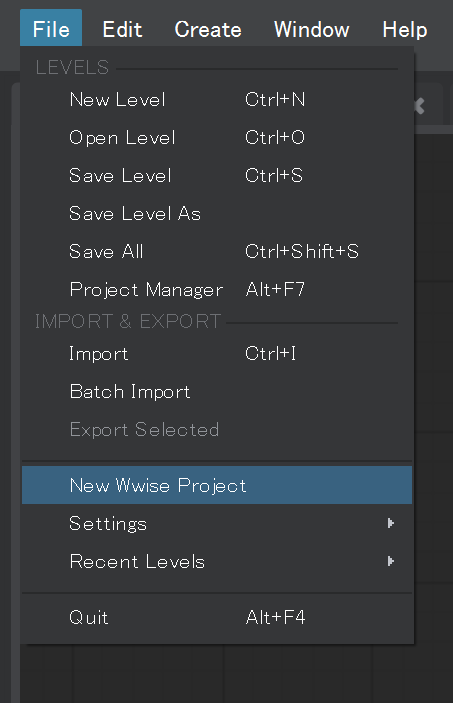
wwiseプロジェクトをStingrayのメニューから作成し、
メニューからwwiseのエディタを起動する


曲を取り込んでみる
Musicを右クリックして、Import Audio Filesを選択

Add Filesからファイルを選択。(mp3はwavにする必要あり)

曲をダブルクリックしてProperty Editorを表示、無限ループの設定をOnにする。

再生イベントの作成
Eventsタブに切り替え、Musicを右クリックしてPlayイベントを作成する

Audioタブから曲をドラッグ&ドロップする

出力する
サウンドバンクを開く

soundbank、platform、languageの三項目を選択するとGenerateボタンが押せるようになる。
Generateボタンを押す。
組み込む
boot.packageに以下の記述が無い場合は追記する。
wwise_dep = [
    "content/audio/*"
]
適当なLevelのLevel Flowを開く。

LevelLoadedノードからWwiseTrigerEventノードへ接続し、
作成したイベントの名前を入力する。

LevelをテストプレイするとBGMが流れる。
一応スクショにファイル名が入ってしまっているので練習用に使った素材も記載しておく
wavestopmusic.itch.io
4K環境だとScaleform Studioのレイアウトが壊れる...
FHDに設定さげたもの

4K設定

Viewport上のクリック位置もずれてる。
とりあえずの対策
ScaleformStudio.exeのあるディレクトリに 以下の内容のファイルをqt.confという名前で保存
[Platforms]
WindowsArguments = dpiawareness=0

ボケボケだが、使えないよりはマシか。
元ネタはCryEngineのエディタのUIが4K環境で豆粒になってしまったとき、一時お世話になっていた設定。
www.reddit.com/r/cryengine/comments/4az4lu/cryengine_v_4k_display_fix
(はてなブログではredditの記事リンクが貼れないようになっているらしいので、非リンクでurlを記載)
VSCode用のファイル非表示設定 ※Stingrayの例です!
なんでもかんでも左側のエクスプローラーに並んでいてゴチャゴチャしているので、
とりあえず目についた順にvscode上で弄らないと思うものを隠した。
※追記.これは開発終了したゲームエンジン「Stingray」用の設定例です。適宜編集してください。
// .vscode/settings.json
{
  "files.exclude": {
    "**/*.flow": true,
    "**/*.flow_nodes": true,
    "**/*.flow_editor": true,
    "**/*.package": true,
    "**/*.png": true,
    "**/*.PNG": true,
    "**/*.dds": true,
    "**/*.DDS": true,
    "**/*.texture": true,
    "**/*.wwise_bank": true,
    "**/*.wwise_dep": true,
    "**/*.wwise_bank_metadata": true,
    "**/*.wwise_metadata": true,

    "**/*.unit": true,
    "**/*.unit_anim": true,
    "**/*.material": true,
    "**/*.anim_clip": true,
    "**/*.anim_controller": true,
    "**/*.anim_skeleton": true,
    "**/*.blend_shapes": true,
    "**/*.fbx": true,
    "**/*.FBX": true,
    "**/*.dcc_asset": true,
    "**/*.import_options": true,
    "**/*.mlt": true,
    "**/*.entity": true,
    "**/*.level": true,
    "**/*.backup": true,
    "**/*.baked_lighting": true,
    "**/*.s2dactor": true,
    "**/*.s2dproj": true,
    "**/*.s2dscene": true,
    "**/*.ttf": true,

    "**/*.particle_editor": true,
    "**/*.particles": true,
    "**/*.physics": true,
    "**/*.physics_properties": true,
    "*_data/": true
  }
}
LevelViewportの軽量化
現在使っているマシンが4KノートなのでLevelViewportがすごく重い。
StingrayにUE4やCryEngineのようなレンダリング品質設定は無いので、
ビューポートのフレームレートを落とす。


高速アクションを作ろうといじっているわけではないのでこれで我慢。
カスタムFlowノードを作る
Noraサンプルのキャラクターを好きな方向に歩かせようとしたが、atan2ノードが意図した値を返してくれなかったため、
公式ドキュメントを参考にカスタムFlowノードを作ることにした。
今回は定義ファイルに直接コードを載せているが、他のluaファイルの関数名を設定して、そちらを参照させることもできる。
ノード定義スクリプトの作成
以下のようなファイルを作成し、script/luaの下に配置する。
(Atan2以外テストしてないので、何か記述ミスがあるかも)
custom_math.script_flow_nodes
nodes = [
{
    name = "Atan2"
    category = "Math/Custom"
    visibility = "all"
    args = {
        x = "float"
        y = "float"
    }
    returns = {
        result = "float"
    }
    query = true
    function = """ return function(t) t.result = math.atan2(t.y, t.x) return t end """
}
{
    name = "Cos"
    category = "Math/Custom"
    visibility = "all"
    args = {
        r = "float"
    }
    returns = {
        result = "float"
    }
    query = true
    function = """ return function(t) t.result = math.cos(t.r) return t end """
}
{
    name = "Sin"
    category = "Math/Custom"
    visibility = "all"
    args = {
        r = "float"
    }
    returns = {
        result = "float"
    }
    query = true
    function = """ return function(t) t.result = math.sin(t.r) return t end """
}
{
    name = "Pi"
    category = "Math/Custom"
    visibility = "all"
    args = {
    }
    returns = {
        result = "float"
    }
    query = true
    function = """ return function(t) t.result = math.pi return t end """
}
{
    name = "Rad2Deg"
    category = "Math/Custom"
    visibility = "all"
    args = {
        r = "float"
    }
    returns = {
        result = "float"
    }
    query = true
    function = """ return function(t) t.result = t.r * 180 / math.pi return t end """
}
{
    name = "Deg2Rad"
    category = "Math/Custom"
    visibility = "all"
    args = {
        d = "float"
    }
    returns = {
        result = "float"
    }
    query = true
    function = """ return function(t) t.result = t.d * math.pi / 180 return t end """
}
]
query = trueというのは、クエリーノードにするという宣言。 クエリーノードにすることによって、Out-Inのソケットの接続が不要になる。
クエリー ノードには入力イベントがありません。その代わりに、別のノードがクエリー ノードの出力データを必要としている場合は、オンデマンドで自動的にトリガされます。クエリー ノードは通常、ユニットの現在位置など、いつでも古くなる可能性のある変動しやすいデータを取得する場合に役立ちます。
実際どういうことになるかについては、最後に記載した画像を参照。
実際に使ってみる
適当なシーンを作成して、Level Flowを開く。
Math>Custom>Atan2を選択。
確認のため、以下のようにノードを接続する。
 接続されていないほうのAtan2はMath>Trigonometryにある、Stingray組込機能のAtan2。
再生すると、コンソールにAtan2の結果が毎フレーム表示されているはず。
クエリーノードにしなかった場合
 こうなってしまうので、副作用の無い問い合わせ関数はなるべくクエリーノードにしよう。